
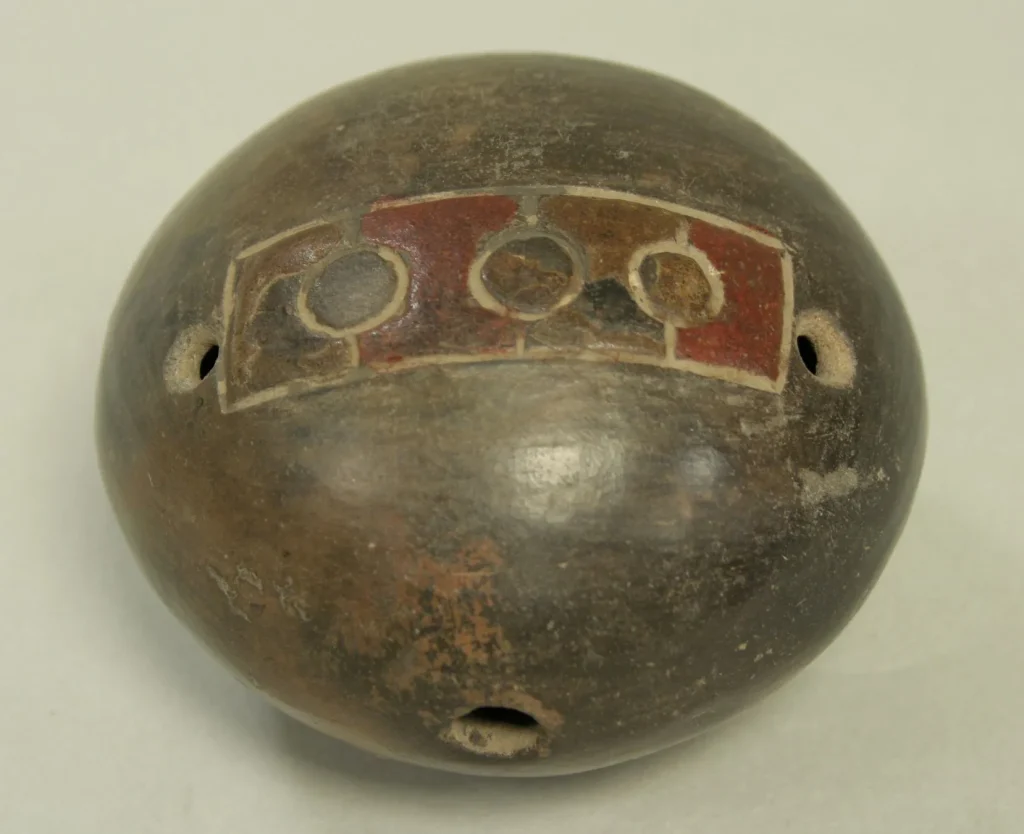
Here is a step-by-step guide to getting started with this compact instrument. The ocarina, made famous by The Legend of Zelda and modernized by Giuseppe Donati, is accessible to beginners.
This article shows you how to read fingering symbols and position your fingers. You will learn to play notes and link simple melodies together.
Practical and reliable, the method draws on established resources such as STL, Hindocarina and OcarinaTabs.org. Tools such as MuseScore and OcarinaTuner help you correct your intonation.
By following this approach, beginners can make rapid progress. One study indicates that 68% improve their intonation in about three weeks with a tuner.
A clear goal: choose an instrument, adopt good posture, control your breath and understand the hole layout.
Introduction: understanding this wind instrument and the aim of the guide
Here is a guide to understanding, in a few steps, how an ocarina turns a gentle breath into precise notes.
Definition: this compact wind instrument is oval-shaped. Its holes produce melodic sounds depending on whether they are covered or open, without requiring forceful breathing.
Its distinctive tone makes it an ideal instrument for an introduction to music. The modern version dates from 1853 (Donati), but its roots reach back to pre-Columbian civilizations.
This learning guide presents a simple method for reading finger positions, controlling your breath and progressing quickly.
In practice: its shape and design make it easy to hold. The hole layout is quick to understand: numbering, partial coverage and finger combinations produce the notes.
- Resources: OcarinaTabs.org, STL, Hindocarina.
- Tools: a tuner and OcarinaTuner to check your intonation.
| Element | Why it matters | Expected result |
|---|---|---|
| Posture | Stability and comfort | Consistent playing with less tension |
| Breath | Control of airflow | Improved intonation |
| Sheet music and tablature | Access to pieces | Measurable progress over time |
Choosing the right ocarina to get started
Your choice of model affects its range, how it feels in your hands and the variety of pieces you can play. A 12-hole transverse ocarina offers a broad range (about 13 notes plus accidentals) and suits anyone who wants to progress to varied melodies.
Transverse or pendant: which model should you choose for learning?
The pendant (4 or 6 holes) is compact, light and ideal for children and casual playing. The transverse model is held horizontally and allows for more expression.

Soprano, alto or bass: which range should you choose?
Soprano: bright, high sound. Alto: the recommended balance for most beginners. Bass: deep sound, but a heavier instrument to handle.
Ceramic or plastic: effects on tone, durability and budget
Ceramic produces a warm, expressive tone but is fragile. Plastic is sturdy, light and affordable. To avoid frustration, choose reliable brands such as STL or Hindocarina and check the tuning before buying.
| Criterion | 12-hole transverse | 4–6-hole pendant |
|---|---|---|
| Range | Broad | Limited |
| Use | Progressing and playing varied pieces | Casual playing, portability |
| Materials | Ceramic or plastic | Ceramic or plastic |
- More holes offer more possibilities.
- Choose the shape to suit how and what you want to play.
- A good-quality 12-hole transverse alto makes it easier to progress.
Posture, grip and breath: build strong foundations today
Stable posture and controlled breathing immediately improve the quality of your playing. Adopt the “tree” stance: feet about 30 cm apart, back straight and shoulders relaxed. This position frees your airflow and reduces tension.
The “tree” stance and a relaxed grip on the mouthpiece
Do not clamp down on the mouthpiece. Hold the instrument gently to produce a steady sound.
Warm up your lips for five minutes before playing: this improves note accuracy.
Breathing and airflow: the candle exercise, “tu” and steady control
Try the candle exercise: make the flame flicker without blowing it out to gauge your airflow.
Use the “tu” articulation to give notes a clear attack. Aim for a steady airflow of around 5 L/min to avoid overblowing.
Current intonation tools: a tuner and the OcarinaTuner app
Check your intonation after each short sequence with OcarinaTuner or a digital tuner. Ceramic and plastic respond differently to moisture: wipe down the instrument and let it dry between practice sessions.
- Adopt a stable posture: it frees your airflow.
- Relax your grip on the mouthpiece: this helps you play clear notes.
- Control your breath: use the candle exercise and “tu” articulation.
Hole numbering and basic finger positions
Hole numbering provides a simple reference for placing each finger quickly. On a 4-, 6- or 12-hole model, holes are usually numbered from 1 (on the left, beneath the index finger) to the last hole on the right.
Key reference points: the left index finger often covers hole 1. On a 6-hole model, patterns such as XXXX56 represent a useful central note for linking phrases.
Matching fingers to holes on 4-, 6- and 12-hole models
Always assign a specific finger to each hole. This reduces mistakes during quick transitions.
- 4 holes: a simple model, ideal for short patterns.
- 6 holes: more variety; the XXXX56 combination is common.
- 12 holes: a wider range and accidentals.
Holding each type of instrument: practical examples
Hold a transverse ocarina horizontally and adjust your thumb positions to keep it stable. The angle changes with a pendant: move your thumbs closer to the base to cover its holes.
Reading tablature becomes easy when you visually connect a covered hole with a finger resting on it and an open hole with a raised finger. Repeat each position slowly to develop a feel for it.

| Model | Numbering | Practical reference | Recommended use |
|---|---|---|---|
| 4 holes | 1–4 | Left index finger: hole 1 | Simple patterns, a quick start |
| 6 holes | 1–6 | Example pattern: XXXX56 | Middle-range notes and common melodies |
| 12 holes | 1–12 | Thumbs stabilize the instrument; the hands alternate | Wide range, advanced pieces |
To go further, find a complete method and suitable sheet music in this practical guide. Repeat short sequences to smooth out your transitions and reinforce the basics.
Ocarina fingerings: clear diagrams for beginners
Identify the key positions and transitions that make learning easier. Here is an overview of the models and movements to practice.
4 holes — first notes and transitions
Simple and short: start with 5 to 7 notes. Diagrams for 4-hole models suit children and rhythmic exercises.
6 holes — middle C and semitones
Use middle C as a reference (for example, XXXX56) and practice semitones by varying how much of holes 5 and 6 you cover. Open or close one hole at a time to control the transition better.
12 holes — range and common fingerings
The 12-hole transverse ocarina covers about 13 notes plus accidentals. Its range lets you play more pieces and complete scales.
Practical resources
“Consult STL PDFs, Hindocarina tutorials, and sheet music and tablature on Feria Musica to progress step by step.”
- Connect each diagram with the feel of the hole beneath your finger.
- Repeat the examples slowly, then increase your speed.
- Use sheet music, tablature and tutorials to explore different scales.
| Model | Key points | Recommended use |
|---|---|---|
| 4 holes | Simple diagrams, 5 to 7 notes | Getting started, children |
| 6 holes | Middle C (XXXX56), semitones with holes 5 and 6 | Common melodies |
| 12 holes | Range of about 13 notes, accidentals | Advanced pieces, scales |
Master essential scales and practice every day
Regular scale practice helps you play clear notes sooner. Start the C major scale at 60 BPM, check each pitch with OcarinaTuner and keep your breath steady.

The C major scale step by step: tempo, control and intonation
Play C–D–E slowly at 60 BPM. Increase the tempo in stages once every note remains clear.
Ascending and descending exercises: variable metronome tempo and fluidity
Alternating between ascending and descending helps build muscle memory. Use a metronome at different tempos (50 to 80 BPM) and work on transitions between notes and intervals.
A 12-week practice plan: rhythm, vibrato and consistency
Fifteen to twenty minutes a day is enough. Week by week, work on intonation, fluidity and stamina. Add a gentle diaphragmatic vibrato once you can hold notes steadily.
“Progress comes from regular repetition and a gradual method.”
| Weeks | Goal | Key exercise |
|---|---|---|
| 1–4 | Intonation | C major scale at 60 BPM with a tuner |
| 5–8 | Fluidity | Metronome at 50 to 80 BPM, ascending and descending |
| 9–12 | Musicality | Vibrato, phrases in G and note values |
- Settle into the rhythm: subdivide the beats and practice long note values first, then short ones.
- Check G: connect C–D–E with the notes on the staff to improve your playing.
Reading sheet music and tablature for ocarina
Understanding symbols and note lengths lets you coordinate your breath and fingers without hesitation. This section explains how to turn visual symbols into clear, rhythmic playing.

Decoding simple tablature
Tablature uses a visual code: ● means a covered hole and ○ means an open hole. Dashes extend a note’s duration, and braces indicate a phrase played on one breath.
Tip: read the tablature while adjusting your breath to the dashes to maintain steady airflow.
Understanding standard sheet music
On the treble-clef staff, identify note values (whole notes, half notes, quarter notes and eighth notes) and rests. Ties, dots and triplets change duration and rhythm.
In practice: read through a measure slowly, then add a metronome and tuner to check your intonation.
Hybrid tablature and tools
Hybrid sheet music and tablature place fingering diagrams alongside notes. They are uncommon but highly instructive: they visually connect fingerings to pitches.
- Read tablature: identify ● and ○, dashes and braces.
- Understand the staff: treble clef, note values and rests.
- Understand the notation: ties, dots and triplets.
- Move to hybrid resources: connect notes and fingerings on the same line.
- Get tools for practice: MuseScore for transposition, OcarinaTabs.org for pieces to play.
| Element | What it means | How to use it |
|---|---|---|
| ● and ○ | Covered or open hole | Match the symbol to the fingering before playing |
| Dash and brace | Duration and phrasing | Keep the breath flowing continuously |
| Tie and dot | Extended duration | Adjust your breath and attack |
Common beginner mistakes and quick solutions
Common mistakes can be corrected quickly with a few simple adjustments and targeted exercises. This section brings together practical advice on intonation, finger coordination and care.
Intonation problems and remedies
Overblowing raises the pitch and distorts high notes. Use a tuner such as OcarinaTuner to check each note.
Practice the candle exercise: make the flame flicker without blowing it out to find a steady airflow.
Finger control and transitions
Lift your fingers about 1 cm to avoid tapping noises. Practice loops of 5 to 7 notes, ascending and descending slowly.
Repeat these short sequences until the transitions become automatic.
- Stabilize your intonation: avoid overblowing, maintain steady airflow and check your pitch with a tuner.
- Reduce noise: lift your fingers briefly and in a controlled way for clean transitions.
- Smooth out transitions: repeat slow loops.
- Manage nerves: break passages into sections, breathe and restart at a slower tempo.
- Care for the instrument: wipe away condensation; let ceramic air-dry and use a soft cloth for plastic.
- Check your reading: compare sheet music and tablature to confirm fingerings and note lengths.
- Maintain stamina: take short breaks every five minutes.
- Choose pieces: favor melodies suited to your level.
| Problem | Quick solution | Tool |
|---|---|---|
| Overblowing | Candle exercise, gentle breath | Tuner |
| Noisy transitions | Lift fingers about 1 cm, practice five-note loops | Metronome |
| Condensation | Wipe and dry | Protective case |
“The most effective method remains short, focused repetition.”
Conclusion
,
Conclusion
A short, focused routine quickly turns effort into melodies.
Remember the essentials: simple fingerings, a steady rhythm and short daily sessions are enough to learn to play the ocarina.
Alternate between sheet music and tablature to connect reading the staff with playing. Choose a 12-hole model in C, made of ceramic for its tone or plastic for its durability.
Use resources from STL, Hindocarina, Feria Musica, OcarinaTabs.org and MuseScore. A tuner helps: 68% of beginners correct their intonation in about three weeks.
Your turn to play: start a 10-minute session today, work through a scale or an eight-measure pattern, and record yourself to track your progress.