
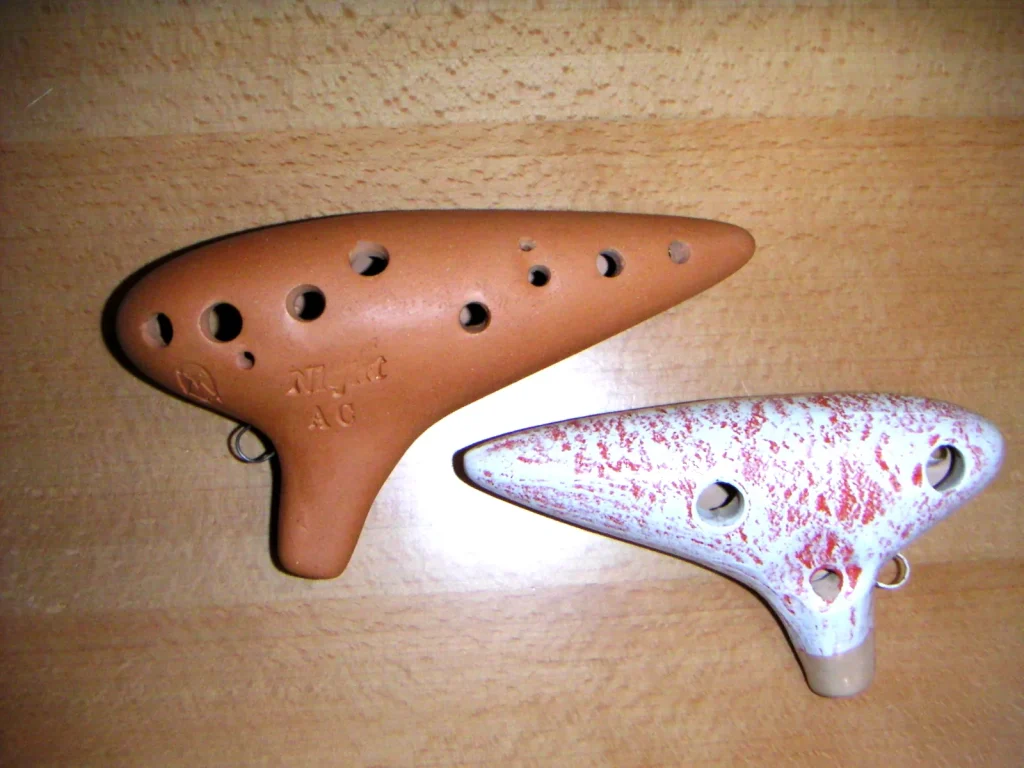
Mastering your breath transforms your sound. The ocarina demands finer airflow control than other wind instruments. Each note requires a specific intensity: high notes need more pressure.
Posture and breathing are essential. Stand straight, relax your shoulders, and breathe from your abdomen to produce a steady airflow.
Simple exercises help you build good habits. Practice articulating “tu/tou,” use a tuner to steady your pitch, and test your airflow with a candle.
Expected result: steadier notes, a clear tone, and greater endurance. Clean the instrument regularly so condensation does not affect its sound.
For a guided plan and practical demonstrations, follow this guide on how to control your breath.
Understanding the role of breath in this wind instrument
Even the slightest change in your breath immediately changes the pitch and tone. The pressure at the mouthpiece determines whether a note is in tune: too much or too little alters it at once.
Why airflow affects pitch
The airflow sets the column of air inside the instrument vibrating. A slight increase in pressure speeds up that column and raises the perceived pitch.
The relationship between airflow and pitch
The faster the column of air moves, the higher the note rises. This takes control, not brute force. Steady airflow keeps the pitch consistent over time.
What beginners often overlook
Beginners underestimate the pressure needed for high notes. Increase it gently without tensing your mouth or throat.
- Hold a note while watching a tuner, and observe its needle as you change the pressure slightly.
- If your notes waver, focus on steadying your breath before blowing harder.
- Breathe early and often to keep your pitch from dropping at the end of a phrase.
| Element | Effect | Tip |
|---|---|---|
| Increased pressure | Higher note | Increase pressure without hollowing out your mouth |
| Uneven airflow | Unsteady note, unwanted vibrato | Practice sustained notes with a tuner |
| Too little breath on high notes | Muffled sound or falling pitch | Increase the intensity in stages |
Posture, hand position, and embouchure: the foundations of a clear sound
Good posture makes airflow easier and frees up your musical expression. Stand with your weight balanced over both feet and your pelvis aligned with your spine. Keep your shoulders relaxed and your chest open to make the most of your lung capacity.
Keep your head neutral and look straight ahead. With a transverse model, keep your head perpendicular to the instrument’s axis to produce an even stream of air.
Hand placement and sealing the holes
Rest your hands naturally. Your fingers should cover the holes completely without pressing unnecessarily.
Focus on sealing the holes rather than applying force: adjust the angle of your fingers slightly to stop leaks. Listen to the sound; a leak is usually easy to hear.
Embouchure: gently pursed lips, relaxed mouth
Form a flexible embouchure with your lips slightly pursed and your teeth clear of the instrument. Your lips should make light, airtight contact without clenching your jaw.
- Quick routine (30 seconds): align your body, position your hands, and check your embouchure.
- Warning signs: if you hear whistling or an air leak, check that the holes are covered and your lips are seated properly before blowing harder.
- Mistakes to avoid: raised shoulders, a tense jaw, and fingers pushing the instrument inward.
| Element | Effect | Quick fix |
|---|---|---|
| Slouched posture | Restricted breathing | Straighten your spine and balance your weight over both feet |
| Air leaking from the holes | Unclear sound, poor pitch | Adjust your finger angle and cover the holes without forcing |
| Embouchure too tight | Restricted articulation | Relax your mouth and move your teeth slightly away |
| Misaligned head (transverse model) | Uneven stream of air | Keep your head perpendicular to the instrument’s axis |
Abdominal breathing and diaphragm control for steady airflow
Abdominal breathing provides a steadier, more predictable supply of air. Inhale gently through your nose. Your abdomen expands, your diaphragm moves down, and your shoulders stay still.

Inhale through your nose and let your abdomen expand to engage the diaphragm
Principle: the diaphragm moves down and the abdomen moves outward. Avoid lifting your chest or shoulders.
Managing your breath as you exhale: “tu/tou” articulation and steady airflow
Your abdominal muscles regulate the exhalation to maintain a steady flow. Use your tongue like a valve: saying “tu/tou” starts the note cleanly without tensing your mouth.
Avoiding breathlessness: tempo, note length, and recovery
Practice lying down to feel the movement, then stand with a candle: tilt the flame without blowing it out. Plan discreet breaths and divide phrases according to the tempo.
- Short routine: 3 cycles of inhaling through your nose while expanding your abdomen, 3 “tu/tou” attacks, and 2 sustained notes.
- Signs of progress: notes held longer, fewer fluctuations, and clean attacks.
How to blow into an ocarina: applying the basics to each note
Each note needs a specific pressure to stay steady and in tune. For every note, find the pressure that keeps the tuner needle centered.
Adjust the intensity to the pitch
High notes require more air; increase the pressure gradually without making the attack harsh. Use the tuner to follow the rising pitch and record the ideal range.
Adapt your playing to the model and material
Two ocarinas in the same key can respond differently. A transverse model often gives you more precise control over the air column. A pendant is compact and calls for careful listening.
“To make your pitch more consistent, spend ten minutes identifying difficult notes with a tuner.”
- Practice plan: spend 10 minutes a day with a tuner, noting the pressure needed for each note and fingering.
- Record what you learn and, if possible, compare several ocarinas to feel the difference.
- Keep your hand relaxed and your fingerings steady so the holes remain sealed at higher pressures.
Practical exercises for learning to play with steady breath
Short routines help you develop a reliable technique. Start with focused exercises, then gradually make them more complex.

“Tu/tou” articulation for clean attacks
Articulate each note with “tu/tou” to keep your mouth relaxed. Repeat the exercise in groups of five sustained notes.
Practicing with a tuner: holding a note
Choose a note, set up the tuner, and hold the note. Adjust your airflow in real time to center the needle.
The candle exercise and steady breath
Place a candle about 20 cm away. Tilt the flame without blowing it out to check that your stream of air remains steady.
Diaphragmatic vibrato: small variations
Introduce a gentle vibrato with small pulses of the diaphragm. Start slowly, with very little variation.
- Method: 5 minutes of articulation, 5 minutes of pitch practice, 3 minutes with the candle, and 2 minutes of vibrato.
- Keep your fingers still during sustained notes to prevent leaks.
- Progression: work on low notes first, then move toward high notes once you can hold them steadily.
| Exercise | Goal | Measure of success |
|---|---|---|
| “Tu/tou” attacks | Clear articulation | Clean attack, relaxed mouth |
| Tuner | Steady pitch | Centered needle, long sustained note |
| Candle | Steady airflow | Flame tilts without going out |
| Diaphragmatic vibrato | Controlled tone | Small, even variations |
Tip: record a practice session once a week to measure your progress. Ten minutes of focused exercises every day is better than an occasional long session.
Common beginner mistakes and how to correct them
Small mistakes can undermine your pitch and playing comfort. Here are the most common problems and how to correct them step by step.
Blowing too hard or too softly, puffed cheeks, and raised shoulders
Assess your breath by listening for falling pitch and muffled sounds. Steady your airflow before increasing the pressure.
To avoid puffing out your cheeks, use your tongue like a valve and keep your mouth relaxed. Breathe from your abdomen so your shoulders do not rise.

Air leaks around the holes and fingers that slap down
Reposition your fingers to cover each hole without forcing. Adjust their angle slightly instead of gripping tighter.
To reduce slapping sounds, lift and lower your fingers close to the holes. Aim for precise, quiet movements.
- Work on one problem at a time: 5 minutes on leaks, then 5 minutes on attacks.
- Use the tuner and candle to spot uneven airflow.
- Quick check: steady breath, lowered shoulders, relaxed fingers, and fully covered holes.
| Mistake | Symptom | Quick fix |
|---|---|---|
| Uneven breath | Falling pitch | Abdominal breathing and a tuner |
| Puffed cheeks | Less distinct attack | “Tu/tou” articulation and a relaxed mouth |
| Air leaking from the holes | Unclear sound | Reposition your fingers and adjust their angle slightly |
| Fingers slapping down | Choppy rhythm | Quiet movements close to the holes |
Sound quality and care: keep your ocarina ready to play
Cleanliness directly affects pitch and projection: a little care after each session helps preserve the sound quality.
Condensation and quick cleaning
Moisture from your breath creates deposits that can block the air channel and change the sound. After each use, wipe the outside with a soft cloth.
Let ceramic dry naturally. Dry plastic more promptly. If needed, clean the holes with a cotton swab.
Storage and care by material
Store the instrument in a hard case, away from moisture and extreme temperatures. Do not place it directly on the floor, and protect it from impacts that could alter its internal alignment.
Example of a weekly care routine
- Visually inspect the holes and air channel.
- Give it a short puff of air to dislodge dust.
- Clean gently where needed with a cotton swab and a cloth.
When the instrument is holding you back
If the tuner needle will not stay centered on several notes despite good technique, the model may be the problem. Choose a well-tuned, consistent ocarina. This makes learning easier and improves the overall sound.
| Problem | Symptom | Quick action |
|---|---|---|
| Condensation | Muffled sound, reduced projection | Wipe and dry according to the material |
| Dirt in the holes | Uneven notes | Clean with a cotton swab and a puff of air |
| Poor tuning | Unsteady tuner needle | Check the model and choose a reputable instrument |
Keep in mind: never bite or force the mouthpiece. A few minutes of care after each session will preserve the sound quality and save time in the long run.

Conclusion
To improve, focus first on posture, breathing, and embouchure. These are the foundations for steady notes and a musical sound on this wind instrument.
Practice regularly: 10 minutes of focused exercises with the tuner, candle, and “tu/tou” attacks are enough to build the habit.
Add diaphragmatic vibrato once you can sustain notes and control your fingerings. Also check that the holes are sealed, your fingers are positioned correctly, and the instrument is in good condition.
Finally, add simple songs to make learning enjoyable. By following these methods and recording what you learn, you will learn to play the ocarina faster and enjoy it more.