
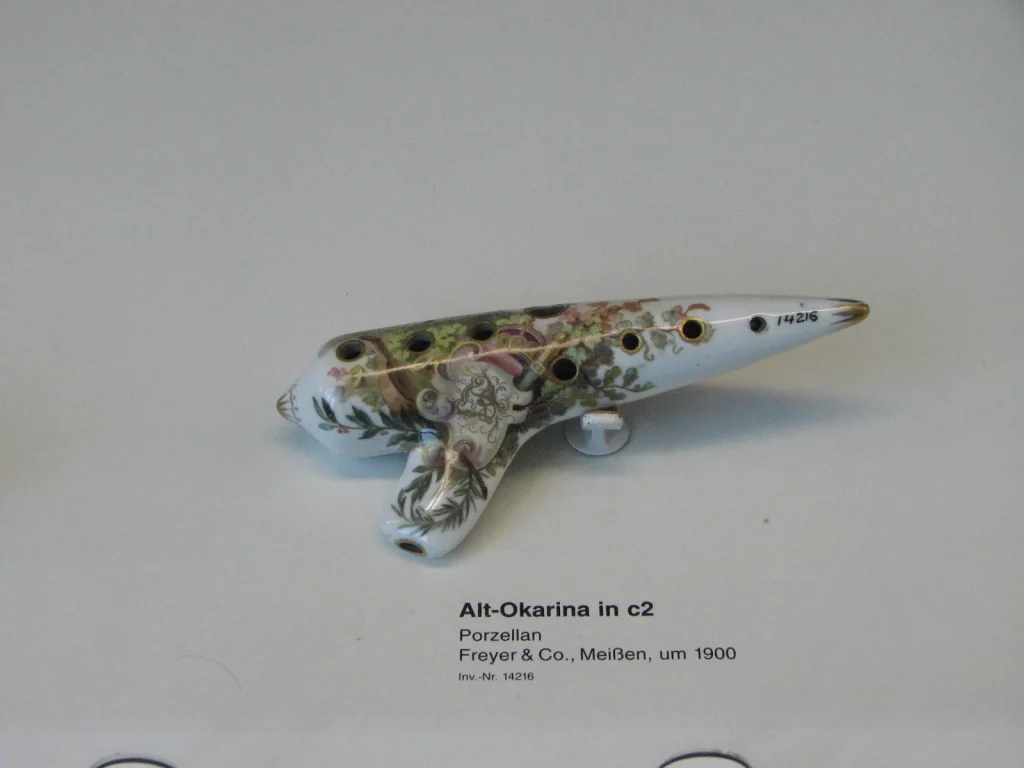
Goal: this practical guide takes you step by step through making a melodic instrument from moldable clay. It covers the usual stages: shaping the cavity, making a mouthpiece with a 45° bevel, gradually drilling the holes, and tuning accurately.
You can make it at home with just a few tools: 2 to 8 mm drill bits, beveled sticks, a knife, a rolling pin, and an electronic tuner. Allow several hours for shaping, followed by 24 to 96 hours of air drying, depending on the size and humidity.
Key technique: knead the clay and throw it onto the table to drive out air and form an even ball before shaping it. A household oven will not vitrify some types of clay, which is why air-dry clay is useful for this tutorial.
For workshop guidance and craft sources, read this article about handcrafting an ocarina. Making your own ocarina takes precision and patience, and brings the pleasure of making music.
Understand the ocarina and plan your project
The key to success is the relationship between the internal shape and the airflow. This enclosed-chamber wind instrument gets its tone from internal resonance and breath control.
The shape you choose affects its acoustic response: oval shapes favor rich low notes, while elongated designs extend the instrument’s range. Use simple sketches to settle on proportions.
For shaping, keep your work surface smooth and slightly damp. Arrange your materials and tools before you begin to avoid common mistakes.
Practical comparison of materials:
| Material | Advantages | Disadvantages | Best for |
|---|---|---|---|
| Air-dry clay | No firing required; easy for beginners to use | Less durable than a fired piece | Home projects |
| Wood | Natural warmth of tone | Takes longer to work; requires suitable tools | Advanced workshops |
| Metal | Durability and a bright sound | Complex machining | Professional production |
The method in this practical guide follows a clear sequence: shape, cavity, mouthpiece, and regular checks.
Be patient, work in measured steps, and test the airflow often as soon as you begin shaping the mouthpiece.
Materials, tools, and safety for making an ocarina
An organized workspace makes every step easier. Gather what you need before shaping: 500 g of air-dry clay, water, and a clean, flat surface. Have labels ready for your pieces, too.
Clay, water, and preparing the base
Essential materials: air-dry clay to avoid firing, water for dampening and smoothing, and a ready-to-use work surface.
Essential tools
- A thin-bladed knife for cutting.
- 2 to 8 mm drill bits for sizing the holes.
- Ice-pop sticks cut to a bevel for the air channel.
- A rolling pin for an even thickness.
Good practices and safety
Reshape two sticks: sand their ends to create an even profile. Score the edges of both halves before joining them so they bond better.
“An organized workspace reduces mistakes and protects your hands.”
Sort the drill bits by diameter and keep cutting tools out of children’s reach. Plan the work in stages: shaping, smoothing, drilling, and acoustic checks.

| Item | Quantity | Purpose |
|---|---|---|
| Air-dry clay | 500 g | Base of the cavity |
| Drill bits | 2 to 8 mm | Drilling the holes |
| Beveled sticks | 2 | Air channel and mouthpiece |
| Rolling pin | 1 | Even thickness |
Making a clay ocarina: steps and tips
Preparing the clay determines the quality of the finished instrument: knead the ball thoroughly to make the clay pliable. Throw it onto the table several times to expel air and remove internal pockets.
Knead the ball and prepare the base
Work the clay until you have a smooth ball without cracks. Then divide it into two equal parts to form the base.
Create the cavity: two hemispheres
Hollow out each hemisphere, keeping the walls evenly thick. Level the edges, then score them to improve the bond.
Join the pieces with a little water, carefully aligning the edges.
Shape the mouthpiece and air channel
Add a small rectangular piece for the mouthpiece. Insert a beveled stick to form the air channel.
Cut a clean window and shape a 45° bevel to produce good resonance. Remove the stick and test the whistle; adjust the angle if needed.
Finishing: smoothing and drilling
Carefully smooth the surface and seams with water and your finger to prevent air leaks into the interior.
Drill the finger holes gradually: start at 2 to 3 mm, then widen them up to 8 mm according to finger size and the desired tonal character.
For more guidance and detailed techniques, see this practical guide to handcrafting.
Tuning the instrument: getting the notes right
Accurate notes come from small adjustments and precise measurements. Start with all the holes closed. Hold a tuner about 30 cm from the mouthpiece and blow steadily to read the fundamental note.

Use an electronic tuner and test the fundamental note
Take several readings under the same conditions. A breathing metronome or a series of steady breaths can help you compare them. Write down the initial reading before making any changes.
Adjust each hole’s diameter step by step
Open each hole in turn and check the note on the tuner. If a note is too low, enlarge the relevant hole in 0.5 mm increments. Test after each pass to avoid going too far.
Refine note attack and stability
Blowing too hard raises the pitch; blowing too softly lowers it. Slightly adjust the airflow angle at the mouthpiece if a note remains unstable. Internal resonance also affects tuning: refine the channel if needed.
Suggested method: test, record each change, and repeat. This approach helps you make an ocarina of your own that is well tuned and reliable.
Drying and hardening the clay: allow enough time and prevent cracks
Gradual drying prevents cracks and preserves the internal cavity. Drying should be slow and even so the walls do not develop stress.
Allow 24 to 96 hours depending on wall thickness and ambient humidity. Place the piece on a raised support and turn it gently from time to time for even drying.
Avoid direct sunlight and strong drafts. If the air is very dry, partially cover the piece with a damp cloth for the first few hours and smooth any tiny cracks with water.

Do not fire the piece in a household oven or on a barbecue. Household ovens do not reach vitrification temperatures (> 900 °C) and heat unevenly. The result could be cracks, distortion, or an unusable instrument.
Choose air-dry clay for a project that needs no firing. Wood, metal, and plastic versions also exist, but each material calls for specific techniques such as gluing, welding, or machining.
“Time and a stable environment protect the structure and the final tuning.”
Allow the full drying time before applying any finish: trapped moisture weakens the piece. Patience and regular checks preserve the quality of your instrument.
Finishing, personalizing, and caring for your unique instrument
Careful finishing supports both appearance and acoustic stability. Once the piece is dry, begin by sanding it lightly with 400-grit sandpaper. Gently sand the surface without wearing down the edges of the holes.
Remove dust with a damp cloth or a light spray of water, then let it dry. Apply a durable acrylic paint and add restrained patterns: geometric, Celtic, or nature-inspired designs work well.

Sanding and painting: preserve the shape
Sand in light passes. Do not build up paint along the edges of the openings or mouthpiece: doing so would affect the notes.
Light varnishing for protection without muffling the sound
Apply thin coats of varnish. Let each coat dry and test the tone after every application. Varnish that is too thick changes the resonance.
Care, storage, and good playing habits
Store the instrument in a fabric case to protect it from dust and knocks. Wipe it gently after each playing session, and check the mouthpiece and bevel.
| Action | Details | Frequency |
|---|---|---|
| Final sanding | 400-grit sandpaper; remove dust with water | Once, after drying |
| Painting | Durable acrylic paint; restrained patterns that leave the holes clear | 1 to 2 coats |
| Varnishing | Thin coats, drying between applications, and a sound test | 1 to 3 coats as needed |
| Care | Gentle wiping, a fabric case, and checks of vulnerable parts | After each playing session |
“Let appearance serve the sound: personalize, test, and adjust again if needed.”
Conclusion
A reliable instrument starts with a carefully made base: shape the body, drill and form the air channel, then adjust the holes gradually until you obtain the notes you want.
Allow the natural drying time (24 to 96 hours) and avoid firing conventional clay in a household oven; air-dry clay makes the project possible without a kiln.
Patient tuning through successive small adjustments produces a stable instrument that plays in tune. Record each test to make your next ocarina easier to build.
This guide provides a clear framework for making your own ocarina. Explore shapes and finishes, test the notes often, choose light coats of varnish, and make safety and patience central to the process.