
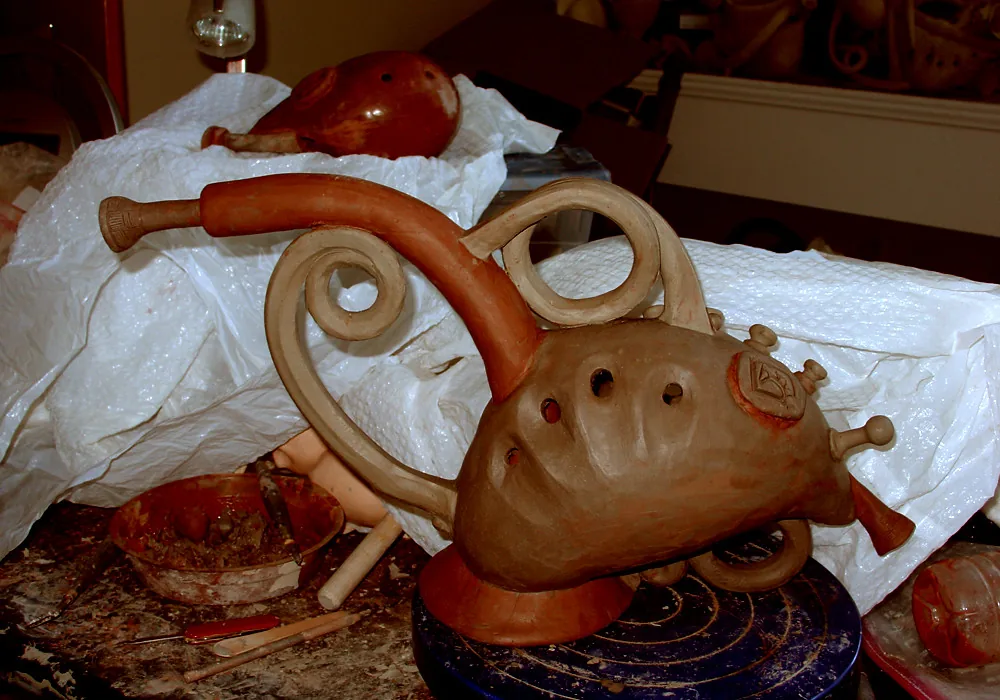
Goal: connect breath, pitch accuracy, and technique so you can start playing from your very first notes. This guide offers a practical, step-by-step method for any musician beginning to play a wind instrument.
Why does this instrument demand so much precision? Air pressure directly affects the pitch and stability of each sound. A structured approach helps prevent unsteady notes and speeds up your progress.
Start with your posture: align your feet, pelvis, and shoulders. Rest the mouthpiece against your lips without touching your teeth. Keep your lips gently pursed; use your tongue to start each note cleanly.
Learn diaphragmatic breathing: let your abdomen expand as you inhale while your shoulders stay still. This essential skill helps you sustain a note and maintain a steady airflow.
Recommended exercises: the candle exercise, long tones, “too” articulation, a tuner to improve pitch accuracy, and vibrato produced by small abdominal contractions. With regular practice, good hand position, and proper instrument care, your first steps in music can be rewarding and your progress swift.
Why breath is the key to playing the ocarina in tune and musically
Controlling the airflow determines pitch accuracy and how well you sustain a phrase. Each note needs its own level of intensity: a C and an F in the same octave may require different pressures.
Blow too hard and a note rises in pitch and becomes shrill. Too little airflow makes it fall in pitch and sound unstable. Each pitch has a particular range of suitable air pressure.
Practicing with a tuner helps you find the right pressure. Test each note, then adjust the pressure until its pitch settles. This simple process helps you learn to play the ocarina more reliably.
The amount of air needed changes with pitch: higher notes require more active support from the abdominal muscles. Breath control and phrasing come next.
- A steady airflow improves tone, note beginnings, and transitions.
- Five to ten minutes a day spent centering your notes is enough to make progress.
Posture and how to hold the instrument: foundations that free your breath
A good sound begins with simple, stable body alignment. Stand upright with your feet hip-width apart. Keep your pelvis neutral and your shoulders relaxed to give your chest room to expand.
Slouching while seated compresses your abdomen and interferes with diaphragmatic breathing. Keep your head aligned with your body and look straight ahead. Distribute your weight evenly to avoid tension that disrupts the airflow.

Hand position and covering the holes
Place your hands on either side of the instrument. Keep your fingers slightly curved and center their pads over the holes. Avoid gripping too tightly: excessive pressure restricts movement and tires your hands.
A partly covered hole immediately puts the instrument out of tune. Never cover the voicing hole; it is essential for producing sound. Adjust your grip so the instrument stays stable without stiffening your fingers.
- Simple test: play a long note and move one finger very slightly to detect an air leak.
- In front of a mirror, check that your shoulders remain still and observe your finger positions.
Mouthpiece, lips, and tongue: creating a clean, controlled airflow
Refine the shape of your mouth to focus a steady stream of air. Make a small opening as though saying “boo”. Gently rest the mouthpiece against your lips without touching your teeth.
Practical adjustment: purse your lips moderately and keep a gentle seal around the mouthpiece. This position lets you blow into the ocarina with a focused, consistent airflow.
The opening and how the air stream works
A stable opening produces a clean airflow. Avoid widening or narrowing your mouth during a note. Excessive lip pressure causes whistling.
The tongue as a valve
Your tongue articulates notes and stops the sound cleanly. Lower it to let air through and raise it to stop the air. Think “too” for a precise beginning to each note.
- Exercise: alternate “too” articulations with long notes while keeping the same lip shape.
- Tip: feel the airflow on the back of your hand before playing to gauge its speed.
- Coordination: synchronize each articulation with a change of fingering for clean transitions.
- Care: wipe the mouthpiece after use to prevent condensation buildup.
| Problem | Cause | Correction |
|---|---|---|
| Whistling | Too much lip pressure | Ease your grip and purse your lips less |
| Muffled sound | Mouthpiece inserted too far | Ease the pressure and maintain light contact |
| Breathy end to a note | Stopping the airflow by relaxing the mouth | Use your tongue to stop the air and keep the pitch steady |
Diaphragmatic breathing: abdominal support and airflow control
Feeling your abdomen expand as you inhale changes how you control the airflow. This simple movement gives you a low, steady reserve of air to draw on throughout a note.

Abdominal inhalation and stability
Inhale and let your abdomen expand without lifting your shoulders. Keep them still and avoid tensing your chest.
As you exhale, gradually engage your abdominal muscles. This movement helps you regulate pressure and stabilize pitch.
Managing airflow without compensating
Do not puff out your cheeks. Your tongue controls the passage of air better than excessive lip pressure does. Inhale through your nose, then exhale through your mouth into the instrument to regulate the airflow.
“Place a hand on your abdomen: feel it rise as you inhale, then fall in a controlled way as you exhale.”
- Exercise while lying down: place a hand on your abdomen, breathe slowly, and feel the movement.
- Candle test: from about 20 cm away, make the flame lean without blowing it out to gauge a steady airflow.
- Pressure steps: hold a note at three increasing levels of pressure without a break in tone.
- Record your progress in a practice journal to track your endurance and the length of your sustained notes.
Ocarina and breathing: mastering breath support
Focused exercises help you produce a consistent sound and keep each note steady.
Practical exercises: candle, long tones, and “too” articulation
Long tones: begin the note clearly with your tongue, sustain it for the length of your breath, then end it cleanly before you tire.
Practice this exercise on a note in the middle register, then move to low and high notes.
Tuner and pitch accuracy: adjusting airflow note by note
Open a tuner and aim for its center indicator. Adjust the airflow in small increments. Repeat three times for each note.
To explore different instrument models, see this selection.
Diaphragmatic vibrato: small changes in breath pressure
Make quick abdominal pulses, around six or seven per second. Do not strain your throat. Practice in short bursts: two minutes per session.
“Quality comes from short, regular repetitions, not exhausting hours of practice.”
- Structure your session: warm up for 2 minutes, practice long tones for 5 minutes, “too” articulation for 3 minutes, and vibrato for 2 minutes.
- Measure your progress: track the length of sustained notes, the stability shown by your tuner, and the consistency of note beginnings.
- Start in the middle register, then extend your practice to other registers.
| Exercise | Goal | Recommended duration |
|---|---|---|
| Long tones | Stabilize the note | 5 min |
| Candle | Gauge the airflow | 10 to 15 seconds per attempt |
| “Too” with a metronome | Improve note beginnings | 3 min |
| Diaphragmatic vibrato | Enrich the tone | 2 min |
Airflow, breath curve, and pitch: adapting pressure to notes and ocarinas
The breath curve describes the gradual increase in pressure needed as you move from low to high notes. Avoid abrupt changes that cause overblowing and alter the tone.

High and low notes: understanding how pressure changes
Start by playing a scale slowly and note how much pressure you feel for each note. This simple process gives you a personal map of the airflow you need.
For example, a low E requires less support than a high C. Feel the pressure increase without pursing your lips more tightly: the air stream should remain steady.
Model and material: their effect on condensation and response
Two instruments in C may require different pressures. Plastic ocarinas quickly accumulate condensation and sometimes respond unpredictably.
Ceramic produces a warmer tone and dries in the open air. Wipe the mouthpiece, use a cotton swab on plastic, and avoid exposing ceramic to direct sunlight.
- Recalibrate your breath curve if you change instruments at the start of a session.
- Record your low and high notes to identify what needs improvement.
- Keep the difference between “fingered pitch” and “blown pitch” in mind: the pitch of a fingered note can vary with air pressure.
The right pressure keeps the air stream steady, without audible breathiness or a shrill sound.
Breathing musically: phrasing, endurance, and when to take a breath
Knowing where to inhale turns a series of notes into a true phrase. A musical phrase expresses a complete idea; breathing at its end preserves its unity and intention.

Breathing at the end of a phrase to preserve its flow
Define the phrasing: identify phrase endings as you would commas or periods. Mark them on your sheet music so you can prepare to breathe.
- Clean ending technique: stop the air with your tongue at the end of a phrase to create a silent break.
- Building endurance: alternate long tones and planned breaths so you can sustain a note throughout its full length without losing tone quality.
- Saving air: blow moderately at the start of a passage to conserve energy for what follows.
- Body position: keep your shoulders relaxed and your back straight; fatigue disrupts stability and finger movement.
“Ten minutes of regular practice is enough to make good breath placement automatic.”
Apply these techniques to the ocarina and any wind instrument. With disciplined practice, you can play for longer and approach your first notes with confidence.
Common mistakes and sound troubleshooting
A wavering sound may point to a fingering or air-pressure mistake. First, notice whether the note suddenly becomes high or shrill: that is often overblowing. Reduce the pressure slightly and engage your abdomen to steady the note.
Overblowing, partly covered holes, and instability
Finding leaks: check that your fingers fully cover the holes and recenter their pads if a note wavers or sounds out of tune when it begins.
If the sound wavers, slow your exhalation, then gradually increase the pressure. Use a tuner to identify a note that is consistently too high or too low.
Cleaning, condensation, and quick care
Quick care: wipe the mouthpiece and any accessible interior surfaces after each session. For plastic ocarinas, use a cotton swab in the holes; let ceramic ones air-dry.
If condensation builds up, take a short break and gently shake the instrument downward before playing again. Always store it in a case and avoid excessive moisture.
Quick troubleshooting routine (example)
- Check your posture and finger placement.
- Check the mouthpiece: ease your lip pressure if you hear a whistle.
- Test the relevant holes and adjust your fingering.
- Recalibrate your air pressure with a tuner and note which adjustment helped.
| Problem | Cause | Action |
|---|---|---|
| Shrill note | Overblowing | Reduce the pressure and support the breath with your abdomen |
| Unsteady note | Partly covered hole | Recenter your finger pads |
| Whistling | Too much lip pressure | Rest your lips more gently on the mouthpiece |
| Moisture inside | Condensation | Wipe it, let it air-dry, and use a case |
Conclusion
In short, brief, focused practice can quickly improve your playing. Mastering breath support starts with a stable position, precise lip placement, and abdominal engagement. Together, these keep every note steady and make the music more expressive.
Follow a simple plan: 10 minutes of exercises followed by 10 minutes of repertoire. This routine can help you play for longer while maintaining a consistent tone.
Cover every hole carefully, check your finger placement, and readjust your breath for each ocarina or other instrument. Light care—wiping, drying, and using a case—preserves its responsiveness and clear sound.
With a few weeks of regular effort, learning to play the ocarina becomes a rewarding experience. Try these exercises and repeat them; soon you can play complete phrases with confidence.